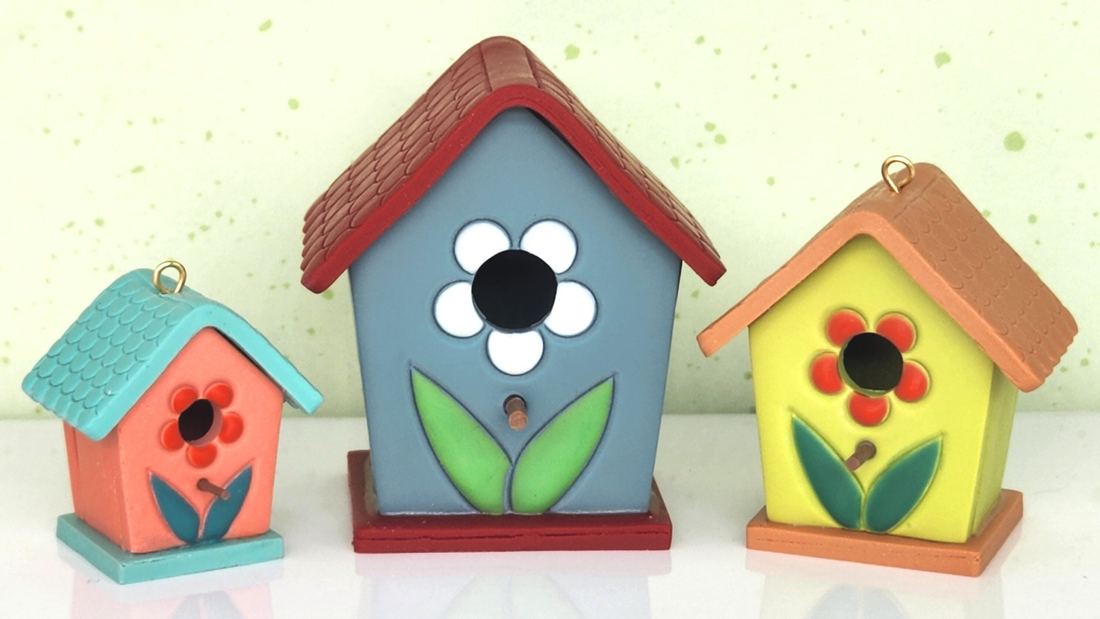
Assembling the 3D Birdhouse
Birdhouse assembly is easiest in several bakes:
1. Cut out the front, back, sides, and bottom. Leave them on the tile to bake. This will help to ensure they don't warp before curing.
2. I didn't show it in the video to save time, but I made the polymer clay sticks with an extruder. I baked them to cure them and then later on, I cut them with a knife before attaching them to the house with some bakeable adhesive.
3. After your pieces are cool, remove them from your tile and assemble with a little bit of superglue. The superglue we used in the video is no longer available, but this is a great high-heat tolerant super glue. I found it easiest to attach the sides to the front and then add the back to the sides. Then take the whole thing and glue it to the bottom piece.
4. Add liquid clay, bakeable adhesive, or solid clay to the joints on the inside of your house to reinforce the joints. Super glue bonds will weaken in the oven, so you really need to add some sort of clay to make sure your bonds are solid. I added a little bit of liquid clay to each corner. It dripped down the joints and eventually settled at the bottom, so that all of the joints on the inside of the house were reinforced with liquid clay.
5. Cut out your roof piece.
6. If you're going to be adding an eye-pin to the top of your house to make ornaments or earrings, do this next. Make sure you kink your wire or add clay to it under the roof, so the wire doesn't pull out.
7. Bend the roof slightly and use bakeable adhesive to adhere the roof to the top of your house.
8. You may now bake your house a second time to cure your roof so that it doesn't move at all when you add details to the front and back. Alternatively, you can also move onto adding details and bake at the very end.
9. Add whatever details you would like to the front and back of our house. This is also when you'll want to add the little polymer clay stick to the front of your house with some backable adhesive.
10. Bake again and then marvel at your adorable tiny birdhouse!
A few things to remember:
- Remember that polymer clay will never burn, as long as it's baked at the correct temperature. When in doubt, bake your creations several times. There's no harm in baking three or four times as you add details. This ensures that you won't crush or smudge any details or the roof as you work with your tiny birdhouses.
- Baking regular super glue may release toxic fumes. Since only a small amount of glue is being baked, you may find the fumes produced to be negligible. As always, do not bake food in the oven at the same time your clay pieces are curing. These tiny birdhouses don't require much glue, so the main concern is your glue bonds deteriorating with heat. Super glue bonds will weaken in the oven. Adding liquid clay, solid clay, or bakeable adhesive to the joints on the inside of your house will ensure that your clay pieces will stay together, and your birdhouses will be very durable.
- If you would like to use a super glue that doesn't break down in the oven, try this high-heat tolerant glue.
- If you'd like to avoid using superglue all together, make sure you're using firm clay that won't warp as you work with it. Your uncured house pieces may be assembled with a little bit of bakeable adhesive or liquid clay, or they may just be sticky enough to not need adhesive at all. You'll just have to play an experiment to find out what works best for you.
- You can always choose to decorate your house pieces before their first bake or before you assemble your house! It may be easier for you to decorate them while they're flat. Please be aware that some paint pen acrylic ink colors change in the oven.
